Recommended tools and equipment for operating a Radical
A friend of mine is getting his first Radical so I created a list for him of the things he will need to operate the car. I decided to post it here so others can benefit and mention anything I missed.
1) You need a way to jack up the car. There are a few ways to do this:
- If the car has air jacks you need a small nitrogen tank a regulator and a hose with an air lance on it. I prefer the aluminum nitrogen bottles that are about 3’ tall because they are lighter than the steel bottles. But I have and use both. The regulator needs to be able to handle 250 to 300PSI. When you are buying an air hose make sure that you get one that can handle the pressure with some safety margin. I prefer a shorter hose and I bring the tank out next to the car but hose length is a matter of taste. Just remember that every time you use the air jacks the entire hose gets filled and over time leaks out so you are using more nitrogen then with a shorter hose. Check the Owner’s manual for details on operating the air jacks.
- You can jack the car up using a “quick lift” jack in the front. For those that are not familiar with quick lift jacks, they a very low-profile jack (~1” tall) with a long reach (~3’) that will slide under the front splitter and reach back to the solid structure of the car for lifting. Never lift from the front splitter. To jack the pack of the car a standard automotive racing jack with work just fine. Check the Owner’s manual for specific details on how to jack up the car using a Quick lift Jack.
- You can put the front wheels up on some 1 x 6 boards to get a little more clearance in the front, and they use a standard automotive racing jack to lift the rear jacking point until the front splitter just touches the ground. Then slide a piece of 4” x 6” lumber that is 4’ long under the car (perpendicular to the center line of the car) as far back on the solid underbody structure as possible. It should be just in front of where the rear diffuser meets the chassis. The rear piece of lumber is right at the balance point of the car and the car will balance on this point, but, . I also like to put another similarly sized piece of lumber about three feet further forward for additional support. Be aware that if you take the front wheels off before the rear wheels that the car can tip backwards (even if you use two pieces of lumber) so it is a good idea to leave the jack under the rear jacking point to steady the car. Also if you are taking off the wheels it is important to remove the rear wheels first.
2) You need a way to remove the wheels and get them back on. Here are the tools that are required to do the job:
- You will need a 70mm socket with ¾” drive. A 2.75” socket will work as well. The socket sold by Radical is a nice tool and I prefer it over other sockets, but any socket of the correct size will work.
- You need a large ¾ inch breaker bar to remove the wheels. Many people prefer an electric impact wrench to do the job of loosening the center nut on the wheel. The easiest way to loosen the center nut is to have someone in the car that can hold their foot firmly on the brake while you are loosening the nut.
- You will need a large ¾ inch torque wrench for tightening the wheels. The wheels need to be torqued to 260 ft/lbs. Torque wrenches are the most accurate in the middle of their torque range so you need a wrench that will work up to ~600 ft/lbs.. It is also important to make sure the torque wrench can torque in both directions, because some of them are not capable of this and it is required because the wheel nuts on each side of the car are torqued in different directions. There is a good post on the Forum discussing the different torque wrenches that work well.
- You will need ¾” extension that is ~3” to 6” long to give you the clearance necessary to torque the wheels.
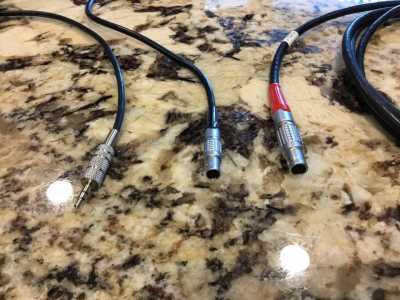
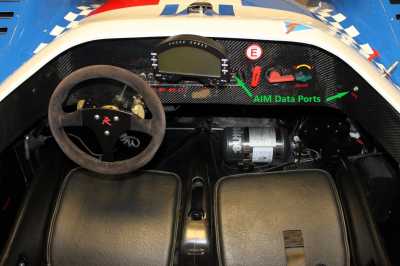
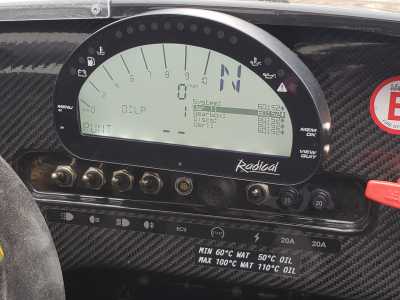
3) You need a method to download the data from the AIM Dash. There are two cables that can be used to do this. AIM sells a simple male plug that attaches directly to the dash for download. The other option is to get the Radical specific cord that has a round plug to plug into the dash. Both of these cords connect to a USB port on a laptop to download the data and configure the dash and camera. I prefer the Radical supplied cord but it is more expensive and both types will work. If you have a newer MXL2 or MXG dash you have the option to wirelessly down load the data to your computer.
In the attached pictures you can see the three cable options available. The larger cable on the right is for downloading the Life ECU data. The other two cables are the options for downloading the AIM Data.
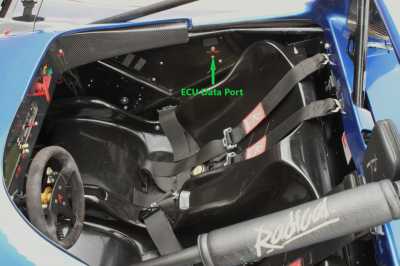
4) You need to get a cord to download the data from your Life ECU (if your car is 2009 or newer and has a Life Racing ECU). This cord has a round plug on one end and a network plug on the other end. The network plug is attached to a laptop to download the data. I strongly recommend downloading your ECU data after every race day. It is easy to do and it can be very helpful if you develop a problem to have the history so Radical can help diagnose the problem. This cord is only available from Radical and it isn’t cheap, but it is definitely worth having.
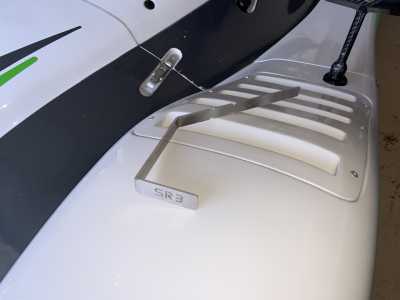
5) You need a dip stick to measure the oil. This is a Radical specific tool and is reasonably priced. I know some people that have made their own, but I don’t think it is worth the effort.
6) It is a good idea to get some safety wire plyers because you will be replacing safety wire.
7) It is good to have a good set of metric wrenches and sockets. For wrenches you should have an 8mm to 18mm set and you will also need a 22mm, 28mm, ¾”, 11/16”, and 1”. The larger wrenches are for changing fluids in the GDU.
Those are my thoughts. Does anyone else have any recommendations to be added to the list?
The numbering got messed up when I cut and pasted it, but I am sure you guys can figure it out 🙂
Does the oil dipstick go in the reservoir? I suppose it has to.
Posted by: @meatmanDoes the oil dipstick go in the reservoir? I suppose it has to.
Yes it does. It is the only way to know if the car has the correct amount of oil.
@charleyhradicalsportscarregistry-com If there is too much oil dies it puke out the top of the catch can? That's what happened to mine yesterday.
Posted by: @meatman@charleyhradicalsportscarregistry-com If there is too much oil dies it puke out the top of the catch can? That's what happened to mine yesterday.
Yes, that is exactly what happens. The oil level increases significantly due to aeration of the oil. The proper way to check to oil level (per the manual) is to run the engine until it reaches operating temperature and then holding the RPM at 4,000 for 10 seconds before checking the oil level.
Where can someone purchase the life ecu cord, a lance to fit the nitrogen bottle/radical, and a transponder?
Seem to be hard items to come across at Spring Mountain.
Thanks!
@kskins1, The Life ECU cord is only available through Radical dealers. SM or one of the other Registry Supporting dealers should have them in stock.
Air lances are expensive wherever you buy them. The lowest price I have seen is from the Manufacturer JLSairjacks.com in the UK. They are still crazy expensive, but slightly cheaper even with shipping.
Transponders can be purchase new but they require subscriptions (as I am sure you know). The hard wired non-subscription transponders are not available new anymore and are hard to find used... and when they are advertised they sell quickly at ~$500.
I see that there is now a bespoke tool kit available to order. Does anyone know what it includes and its cost? The Radical folks I talked to did not have any details. I was thinking about getting it just in case did more of the ongoing maint myself.
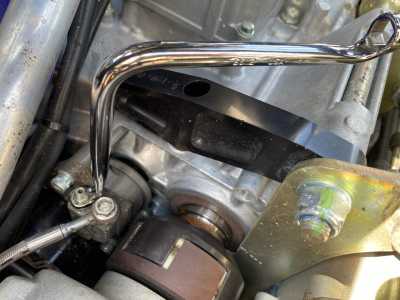
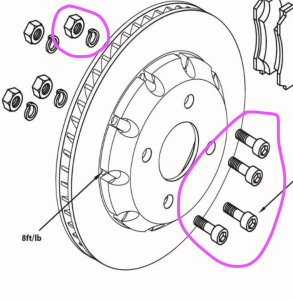
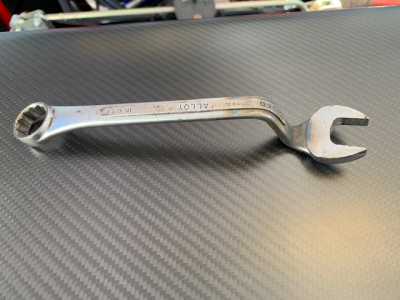
More info on the wrench please. Curious if they have one to fit the back difficult side of the wheel drive pegs on the rotors? Those nuts are buried, anyone found special tool for that?
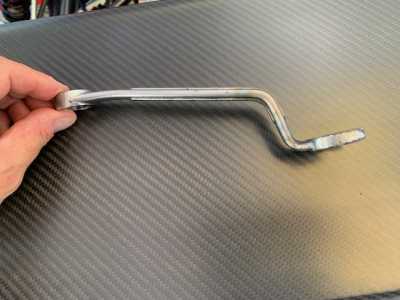
It is just a Snap-on bleeder wrench (item number S6112. https://shop.snapon.com/product/S6112 ). There are lower cost options on Amazon.
Are you talking about the brake disk to hub bolts? I think just take the upright off the car, and there is just enough room to fit a socket on the nuts in there one at a time -- you have to rotate the rotor. BTW, do not torque this to 80 ft-lbs -- use 50. There is a table in the owners manual that says 80, but the picture says 50. I think I used blue Loctite also, but I am not an authority. Small amount of red Loctite may be better for this. In fact, I may have used red.
Yes, those are the ones. I have heard horror stories from two racing dealers of these 4 drive pegs getting loose and causing havoc. They both purposefully tighten and retorque every weekend. Thus, must be able to get wrench on back side cavity while mounted on the car. They made these bent wrenches to service it (which is much harder than it looks).
I forgot. One of those dealers actually replaces the factory drive pegs/nut with special Knuts & loctite, then dont worry any more as they apparently stay tight better.
@raider89 - Hi Dan,
I haven't heard of that issue before. In fact I haven't heard or seen anything particularly special about how these pieces of hardware need to be checked so often. Probably have to wonder if there is a reason why those couple of teams are having issues when it seems likely not many others are....
Has anyone else any insights into this? Is this something that should be checked really often?

