
Posted by: @davidfThe technician I spoke with today does a mini refresh, like I am doing, at 20 hours run time to replace the forward gear and often the crown wheel. He said that at 20 hours, there are sometimes extensive damage to the forward gear, sometimes minor.
@davidf, wow, I am surprised there is that much wear in 20 hours. 😳
20 hours is not great!! Although I have seen a forward gear starting to wear after only a few hours. I guess once the metal is in the oil it probably speeds up the wear process, plus once the case hardening has gone it will rapidly wear anyway. Super finishing all the gears (or at least all the loaded gears) should help, along with using good oil and regular oil changes. An in-line filter is also not a bad idea. Again it’s definitely not a fix, there’s only so much you can do with the products available.
Fortunately I did not see much damage elsewhere. I will look into super finishing -- thank you for the tip.
I found a tiny bit of steel on the bottom outlet fitting magnet, and similar amount on the level plug magnet.
I plan to remove the GDU every 20 hours to inspect and replace pitted gears and bearings as needed. It is not difficult once you have done the procedure once, and I did not even need to remove the oil pump or breather plate to maneuver it out. I ended up disassembling the GDU by myself which is also not hard, but a little messy and tedious to clean everything well.
This time I will only replace the forward gear and the paper gasket, and five drive pegs. Drive pegs and gaskets are pretty inexpensive; not so for the other parts.
@charleyhradicalsportscarregistry-com ... refer my earlier post with video... I've got what looks to be the start of that wear pattern on almost all 24 teeth of the forward drive gear after only 6 hours... mine will definitely be worse than David's at 20 hours!
... I still suspect (strongly) that the difference in what people are experiencing is because some cooling pumps prime themselves after a re-fill, and some don't.
Hi All,
Just a bit more of an update on this topic.. I feel like I'm starting to understand what's required here.
I now own three of these GDU's (one in the older RSX I have, a brand new one in the XX delivered earlier this year... and the 'spare' I purchased before deciding to buy a new car)
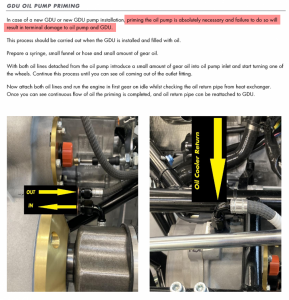
What triggers this post is something I found in the newest XXR Owners Manual... seems Radical have been reading our posts.. or maybe (finally) realising there are some GDU's that never 'self-prime'
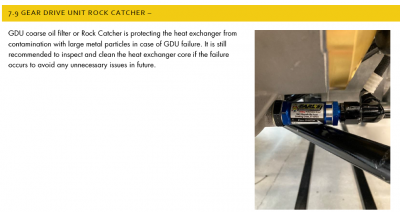
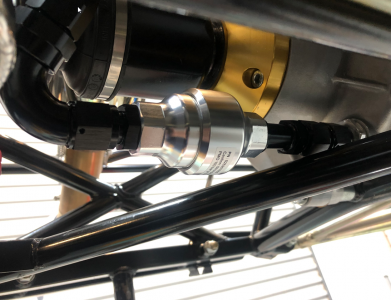
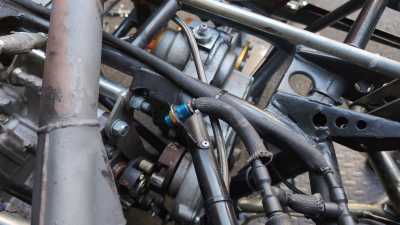
They are also fitting a 'rock catcher' on the GDU drain fitting that filters the oil to the GDU pump and oil cooler circuit...
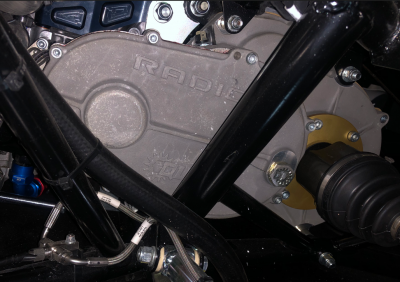
My new XX delivered to Australia in March doesn't have this 'Earls Filter' fitted, so suspect it's on all new XXR's?
As written here on a previous post I now check my GDU is primed before each race weekend - takes about 5 minutes... it's my theory that they can lose their prime if they sit in the garage too long between events... and I have proven that by finding no prime until I use the syringe (I use that instead of a vacuum pump described by someone else on this thread). Since taking this approach my forward drive gear wear has noticeably slowed down (checked using a video borescope after every second event). I'm using Neo-Synth RHD oil.
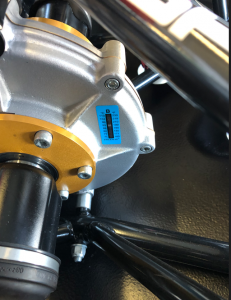
I also now use a RaceTech temp strip on the outside of my GDU case to try and get a handle on GDU temps.
I've only just started this and tried a temp strip with a range of 71C - 110C. We had 5 races in total, but the first 4 heats were only over 5 laps (plus 2 lap warm-up) of a 2.5km long circuit - the temp strips showed a max temp of 93C after each of those. The final race was held over 10 laps (plus 2 again) but this time the temp strips showed a temp of over 110C ... probably a bit hotter than I expected. These strips obviously measure the gear case temp and I expect the oil might be at least 10-15C hotter than that.. although not sure.
For the next event I have installed a new strip with a temp range of 116C - 154C and I'm hoping it doesn't register too far up on that!
I'd be keen to hear if anyone has similar experience or data... or even an opinion on how hot we should expect these to run.
The oil removed after the last event still looks fine, and there was very little metal debris on the Magnom magnet filter I've installed on the oil feed line to the pump.
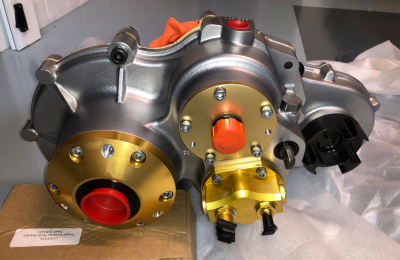
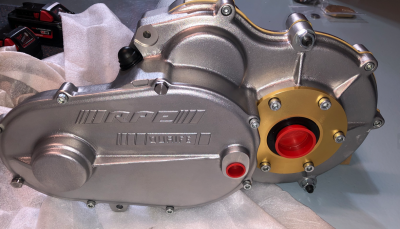
In the meantime, I've prepared the spare GDU for when it's needed... micro-polished the gearsets and vapour blasted the GDU casings to tidy them up
vs brand new...
@rjbender That’s really interesting 👍 It sounds like Radical have ditched the oil cooler and replaced it with a heat exchanger for the XXR? Not sure about the 1st gear at idle part of the manual, I’d have thought the pump would be turning too slowly. I normally use a higher gear for that job.
Not a huge fan of the “rock catcher” oil filter. They are fitted to the gearbox oil system on SR8’s. Problem with them is the filter is flat, so it could potentially block completely, which I have seen a few times on SR8’s, and causes more harm than good. Although the blockage is normally caused by sealant, so less likely to happen on a gdu.
Your spare gdu looks absolutely awesome, great job on that. I’d like to think the polished gears will make a difference to the wear, it certainly has on a customer car of mine. I particularly like the threaded holes on some of the billet parts on the casing, so you can remove them easily, very cool 👌
@alex-heavens -G'day Alex, You noticed the threaded holes - Well spotted!... yes, will help get it apart without causing damage to the mating faces.
I agree with your comment about first gear at idle normally being to slow... but I wonder if that's because all of our pumps lose prime to some extent and that requires the pump to be driven faster to get enough suction to re-establish full prime. If they have just (fully) primed the pump with a syringe I think 1st gear might work? My concern is always that the pumps lose prime.... and on my RSX that definitely happens over a month or more between events.
Yep - also agree about the rock catcher... also interesting to see that they have machined the hex head of the Earls filter to get it to clear the chassis rail.... its a tight spot.
I've put a MagNom filter in my pump suction line - best upgrade so far to the GDU. Easy to clean and will definitely catch any steel particles before they get to the pump
Hi everyone
Reviving an old thread! I'd like to finally get my head around the process of priming the GDU pump. I've read through the thread, but i just don't get it. Can anyone help me complete the below procedure?
Syringe method
1. The objective is to ensure the GDU pump is flowing oil from the GDU to the GDU cooler and back again to the GDU (correct?)
2. To do this, the GDU pump needs to be primed with oil along with the lines to and from the GDU cooler, because the pump will only function if there's oil in it (correct?)
3. Remove the oil pickup pipe (GDU to pump)
4. Remove the oil feed pipe (pump to Cooler) and fill both with oil (pump and pipe), using a syringe. Fill until oil is coming out the IN side of the oil pump (pump side in, from GDU).
(do I need to also fill the return pipe, cooler to GDU?)
5. Reconnect all hoses. Remove the GDU side of the return pipe, and place in a funnel, with the funnel sat in the top of the GDU where you normally fill it.
6. Start the engine, wheels off, run through the gears through to 6th. This spins up the GDU enough to create enough pressure that oil should start flowing and coming out the return pipe. (correct?)
7. Jump out car...check oil is coming out the return pipe and pouring into the funnel. If it is, job is complete.
Have i got that all right?
Vacuum pump method
People have mentioned using vacuum pumps instead. Would this be a hand pump or electric?
Where would you attach it? Is it more effective than using the syringe?
Is the method here to use the vacuum to suck oil through the pump instead?
@rojid I think you are overthinking this a bit. I’ve somehow got away without ever having to prime the pump, although I do agree it’s a good idea to do, but I would probably only ever do it if the gdu has been rebuilt and is completely dry. If you are just doing an oil change, then good chance you won’t have to prime the pump, but do check with the return pipe in the funnel and run in 6th gear method. Whenever I’ve done an oil change, I use this method, and I barely have to wait before the oil is pumping, and that’s with the cooler and pipes drained too, but there must be a bit of oil still in the pump, enough to start the pumping process.
So are you just doing an oil change or is the gdu rebuilt?
unfortunately i struggle to think any other way 😭 😀
it's rebuild time, both engine and GDU. I saw the notes from the radical technical bulletins and it says priming is advised, on a dry fill. I'm just arming myself with as much knowledge as possible before i send both off for rebuilds.
on a completely seperate note, i would be keen on doing the GDU rebuild myself, but like with the engine, I don't know what 'bad' looks like - other than looking out for really obvious pitting, scoring, etc... without the experience of having seen a worn one close up, i wouldn't know what needs replacing and what could be left, other than the parts in the rebuild kit.
Are there any pics or knowledge that could be shared here in this regard? (open question to the panel!)
maybe I should do what @rjbender has done in this thread, if i ever have some spare change i should buy a new GDU and inspect it so i know what used vs new looks like....
In the case of totally dry and you have to prime the pump, I would personally leave the inlet pipe on the pump and take the other end off the bottom of the gdu, rotate the pipe so it is higher than the pump, then fill that pipe with oil. Then turn a wheel forward (or both) whichever gets the cush-drive coupling to turn, which means the pump will be turning (the correct direction), until oil comes out the outlet of the pump. Then stick the pipes back on and fill with oil, and then run in gear with funnel on return. There’s no need to completely fill the pipes and cooler to prime. Just fill it to level plug, run it in gear, then check the level plug again.
It is possible to do the gdu yourself for sure. Helps if you’ve done a few gearboxes/diffs before. Buuut, if you’ve never done anything like this before, then potentially it will be easier to get it done elsewhere, but that’s up to you. The main things to look for are pitted/worn or damaged gears (forward gear and crown wheel, and the changeable ratios, all the ones which get load) worn bearings, condition of pump housing and gears. Reverse is unlikely to have any pitting/wear as no load on them, but it could. If you’re going to strip the diff too then check all the worm gears and Belleville washers, and get new crown wheel bolts. If there’s been a failure in the past, or a lot of pitted gears, there could be lots of bits of metal flowing around the gdu and cooler, then the bearings will probably be quite worn, and there could well be lots of nasty stuff trapped in the cooler. If that’s the case, either change the cooler or get it professionally cleaned. This is the advantage of having a magnetic filter, can save the pump and cooler. I’m sure a lot of failures occur because of a previous failure and the cooler didn’t get changed. I know Tim Gray TGM does a magnetic filter kit.
Where are you getting your engine done? RLM? They can rebuild gdu’s, so it might make sense to get them to do it as well, if they’re rebuilding the engine 🤷♂️
I’d say there’s no point in getting a brand new gdu just to see what it should look like internally. I don’t know how much they cost now, I’d guess over £6K. Also it will be a different spec as Radical now use a wider forward gear and crown wheel, and a narrower reverse to make those fit, so some of the internals will be different to what you’ve got now.
my GDU is from 2021, I've studied the service guide + bulletin on the upgrade kit, which comes with the wider forward + thinner reverse gears you speak of + a few other bits. I will be getting both kits + all parts recommended in service guide, minus the 2 gear locknuts (those are still new, only seen an hour of running).
I've never done anything like a Diff or gearbox before. If the job is anything like the service guide, then it looks fairly straightforward to me (the amount of times I've said that before it all going wrong 😭 )... I've just emailed Radical for a quote on the service kit + upgrade kit. I want to learn and i'm curious to see how it all looks so I might well give it a go myself, take pics, post on here, see what everyone makes of it.
The only thing that looks a bit scary is fitting the new bearings back in the casings and using heat...never done that before. If it's not as simple as how the guide makes it out to be....I will reach out to a professional.
My unit has an Earls filter on it as per the pic in the XXR manual - referred to as the 'Rock catcher'. Fluid changes have always looked clean, no worrying amounts of particles etc. I took apart the filter and there were no particles. It's not magnetic...maybe the TGM one is more effective?
Yes, engine will be going to RLM. I didn't think about particles remaining in the GDU cooler, I will look into cleaning it, thanks for the tip.
@rojid Yes heat will be required. If you’re changing all the bearings too, you’ll need heat to get the old outer bearing races out.
The magnetic filter is a much better idea than the rock catcher. The rock catcher can still let small bits through and damage the pump, but even worse it can easily be blocked by sealant/bits of metal and starve the pump of oil completely.
If you don’t know the full history of your car, as in, has it ever had a gdu failure before you had the car, it would be well worth checking the cooler. There’s a union on the cooler which can be taken off (after the pipe has been taken off). If you take the lower union off and put a magnet into the cooler and see if you pick anything up. If you pick up any big chunks of steel, then probably best to just change it. It’s an off the shelf cooler and would probably cost more to get it cleaned properly than a new one. If nothing picked up, might not be necessary to go any further. But if you’re going to flush it through, make sure you’ve got as much of the cleaning solvent out as possible (which is obvious, but is also surprisingly difficult), as you don’t want it mixing with the new oil.
I don’t know how effective the new wider gears are. Might be worth asking on fb as to what people have found with them, how long they last etc. I think it is a pretty big expense to upgrade, but it might be worth it in the long run. I found that super finishing the loaded gears makes a big difference to the life span of them, and also regular oil changes. And keeping an eye on the forward gear which you can inspect with a borescope through the cooler return. That’s the gear that always seems to start pitting 1st. If you catch that early, it’ll prolong the life of everything else too (as will the magnetic filter), because you then won’t have grinding paste circulating through the gdu.
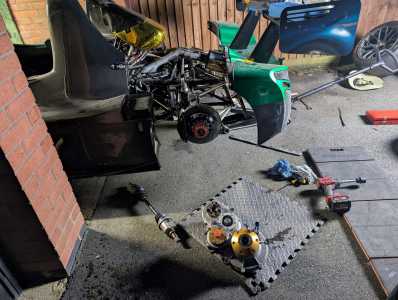
so the weather here in the UK finally hit double digits (celsius) and work on the car begins in earnest - starting with removing the GDU hence reviving this thread. This serves as a reminder to myself for whenever I have to do it again infuture.
it was the First time i'd ever removed the GDU and was an adventure doing it on my own. This won't be of any help to the seasoned vets on this forum however for any complete newbies like me venturing into more difficult servicing matters after 3 years of ownership.....you may find it of use. My additional thoughts and tips would be:
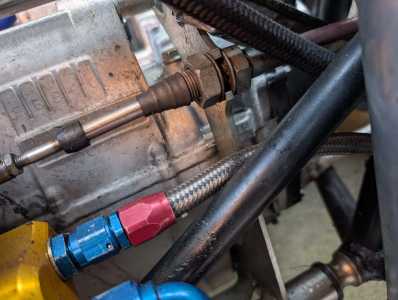
- to pull the GDU out from underneath in the space in the chassis just behind the GDU, it requires removing the oil pump. When the GDU is in place, accessing the bottom caphead bolt is quite difficult however i managed to undo it with a ball end of an allen key, though this felt dodgy and i've probably not done the inside of the cap head any favours. Therefore i'd recommend removing the pump after you've shuffled the GDU rearward and tilted it upward as then you can access all bolts easily. There is a slot built into the GDU case which allows you to prize off the pump easily.
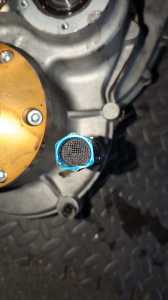
- i removed all union fittings as well to avoid damaging them: the 2 for the oil pump and the 28mm socket at the top which you remove to refill the GDU. I also tried to remove my 'rock catcher' earls fitting whilst the GDU was in its normal position but completely messed this up, didn't have the right AN wrench, tried using an adjustable one and ended up actually rounding off and crushing the edge of it inward, so it's destroyed. Not a big loss as I was going to upgrade to the Tim Gray magnetic filter anyway. In hindsight this can also be removed after you've shuffled the GDU back and tipped it upward. There were a few moments where the GDU shuffled itself down as I was tipping it up and some weight was sitting on the filter. I don't think anywhere near enough to actually bend or damage where it bolts onto the GDU case, even so it's not the best of circumstances.
😞
- i did initially remove the ratio cover however after some sound advise, put it back on and it's a good thing i did otherwise I would have definitely 'clanged' the ratio gears/drive nuts against the chassis. The cover does not need removing and does not hinder the process at all.
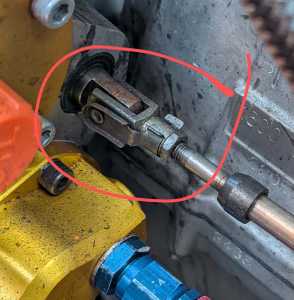
- To remove the reverse cable it's a super simple spring loaded clip which prizes off easily with a flatblade screwdriver and then it swings down and you can pull the pin straight out the clevis holding it in place. Then to move the cable out the way requires loosening the large nuts that fix the cable to the engine cradle thing.
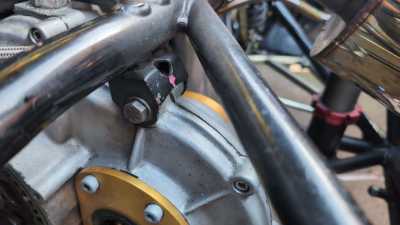
- to remove the GDU i first propped up the bottom of the case with a jack to support, then removed the top bolts first. You also have to remove the mounting point fixture also otherwise you can't wiggle it sideways to remove from the engine side coupling. I adjusted the jack so that the bottom bolts could slide out easily.
The long bottom bolt that sits at the back of the case can't actually be removed with the GDU in place as there isn't quite enough room, the chassis is in the way. However you have to pull the left side of the GDU with your left hand to start wiggling it out the coupling, whilst pulling slightly up with your right hand and then you can remove this long bolt. Basically at this point you're slowly shuffling it left to right and then starting to tip it upward, as you release the jack to lower the bottom. At that point and after removing the oil pump, you're home n dry.
The end result....
@rojid .. good to know it can be taken out from below. I've always taken it out by removing the rear tail section of bodywork (and the rear wing to make that possible) and then lifting it up/out. There no need to remove the GDU oil pump that way (unless you have an older chassis without that GDU bracket that locates the top of the GDU into the top cross chassis member - for older cars without this you apparently need to remove the pump like you have done)
