@crit If it had a gear position sensor I'd have built my own display with a suitably enormous digit, but sadly no, this is an old-school Kawasaki setup and I didn't want to spend the time fiddling with filtering algorithms.
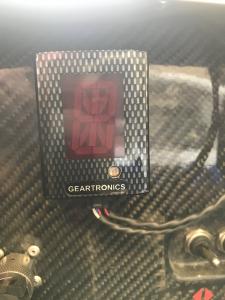
I installed the Geartonics Gear Indicator this weekend. We installed it at the track during my race and I didn't have time to record the install. I will post pics of the completed system. Bottom line, super easy to install. The kit comes with a display and a wire with 3 connectors (power source, display and shift indicator). Once the wires are connected you "program" the system by selecting Max # of gears and then confirming the gear on the display. Only problem is that my system does not recognize reverse. Possibly because it is a "mechanical" selection. I have not had time to trouble shoot but not a big deal for me. The display is sometimes hard to see when the sun is at your back but otherwise worked great. I recommend it!!
@johnannz - thanks for the offer to post some info on the completed system. I’ve purchased the exact same setup for my SR3 RSX.
I have two questions....
1. which route did you run the wire loom from the connector in the engine bay to the dash? Did you run the wires down the right or left hand side. Given you did it at the track I would guess you didn’t take the side pod off to get it completely tucked away...
2. The Geartronics loom has a power supply plug at the dashboard end. Is there a matching plug half in the Dashboard loom that can simply be plugged in? I gather by your comments that it’s there waiting?
Thanks for any help.
Rod
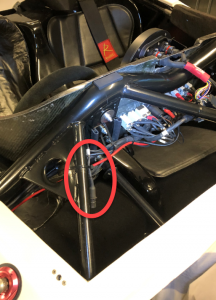
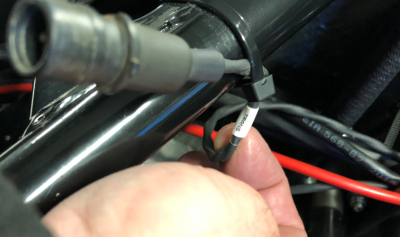
@rjbender I ran the wire (in the engine area) down the passenger side and the crossed over behind the head rest and the left side of the drivers seat. There is enough wire to "cross over". I used zip ties to secure it. Yes, the found a connection to the power supply on the left side of the steering wheel (under the dash) and just plugged it in.
@johnannz - Thanks John. Got a bit confused by your description.... then realised you sit on the wrong side of your car 🙂
Appreciate the info - I'll have a go this weekend!
@rjbender and use "z" in realized 😊
@johnannz - so you sit on the wrong side of your car.... and you can’t spell!
... things are a bit back to front in the Northern Hemisphere!😆
@johnannz - Thanks John! - they are really helpful photos.
I'm going down the exact same route, and have just finished wiring up the gearbox end of the loom supplied. Geartronics, Neil Wallace was fantastic to deal with - excellent service.
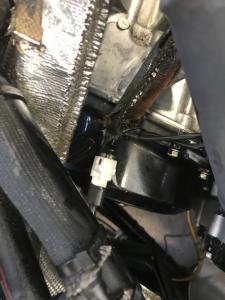
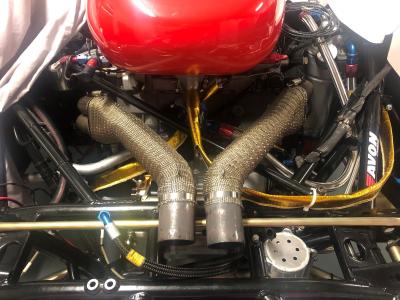
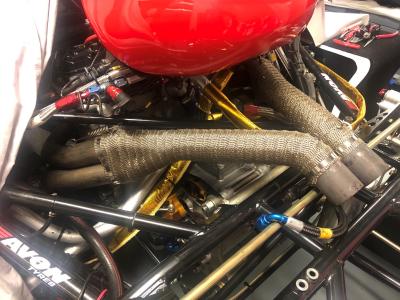
I note in your photos what looks like a slightly 'charred' insulation sleeve on the wiring loom. Mine was exactly the same as the wires from the gearbox ran extremely close to the right hand side exhaust header.
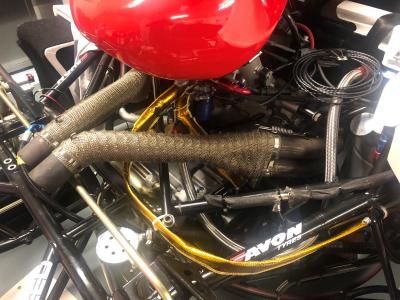
I've just tidied mine up, including heat wrapping that section of each header, after connecting the Geartronics supplied loom into the existing spare plug (mine was the same as yours - the small white triangular shaped plug)
Here's some pics of progress to date.
@rjbender you just shamed me into a good engine cleaning on my car. Very clean!!!
@rjbender you just shamed me into a good engine cleaning on my car. Very clean!!!
@johnannz - unfortunately that's because it hasn't had much use!!!! Thanks for the feedback though.
...your scorched heat shielding looked almost exactly like mine. I managed to undo some of the zip ties on that loom under the airbox and found another 3 inches of cable length. That allowed me to flatten out those wires that run from the top of the engines gearbox to up under the airbox where the main loom is located. Now, instead of heading straight up close behind the right hand header pipe, they head 'flat' across the top of the gearbox and then head up almost vertically to the middle of the airbox (much further away from the heat).
I'd suggest you have a look to see if you can do something similar...
@johnannz - Thanks Again John, Made progress on my install of the Geartonics Unit yesterday - your pictures and experience helped a lot.
For the benefit of others, I ended up routing the wire loom from the right hand side of the engine bay down the right hand side of the car in behind the side-pod. I did this following the same route as the braided air jack line that runs down that side of the car (it is cable ties to the support structure that locates the cockpit surround fibreglass panel. I simply zip-tied the loom to that braided hose, which is almost perfectly located for the job. I got access at the mid point by taking the ECU cover panel off the inside of the cockpit and worked from the engine bay up to that point, then when I had it that far, I completed the job by bringing the loom into the area behind the dash through the existing hole/grommet up under the dashboard (located perfectly for this).
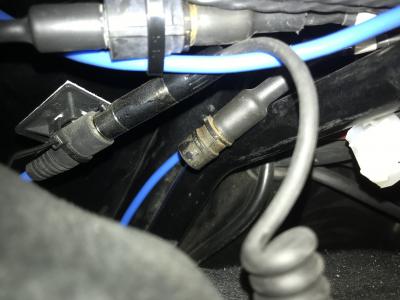
The only question I have is about the connection of the power supply at the dashboard end. I think I've found the right connection point. It is labelled "Trans" and currently has nothing plugged into it.
Is this the right one? (or maybe it doesn't matter because I suspect it's just a 12v supply (there's only two pins in the Geartonics plug and on the plug shown in the pics)
... see pictures below.
Any help with that question appreciated!

