Side Pod Removal on SR3 / 8
Several people have recently asked how to remove the side pod from their SR3 /8 so I decided to share some pictures on how to do it.
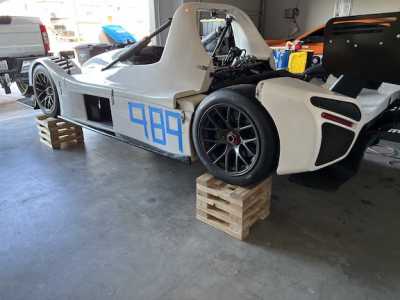
Removing the side pod really isn’t too hard of a job, it just takes time. I definitely recommend supporting the car on jack stands or on blocks to do this job. I used my air jacks which was not the best approach because you need the car in the air to remove the lower bolts but you can’t remove the side pod with the air jacks extended because they extend through a hole in the bottom of the side pod.
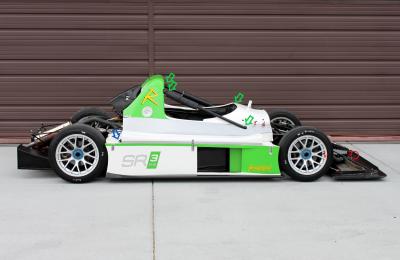
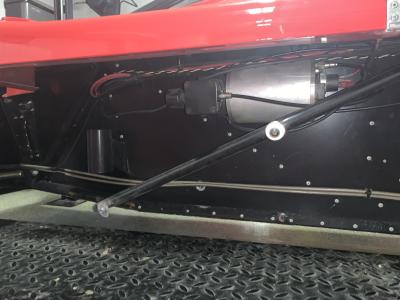
The first step is to take the nose and tail off of the car. Then loosen the center top section of the bodywork. You don’t need to fully remove this section (Note: to fully remove the center body the faring under the roll hoop would need to be removed first), but freeing it up gives you some room when removing the side pods. Start by removing the lateral roll bar side braces. There are hex head bolts (4 total) under the caps on each side of each lateral brace. See green arrows in Figure 1. Then remove the bolt holding the center body to the side pod (there is one on each side) marked with the blue arrow in figure 1.
Figure 1
At this point you need to decide how you want to handle the radiator. There are two options. The first option is to drain the coolant and remove the coolant lines from the radiator. The second option is to remove the radiator from the side pod. Either way works and both have their challenges. If you decide to remove the radiator there is a bolt on the top and bottom of the side pod that clamp the radiator in place.
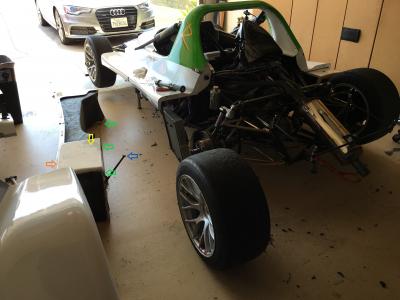
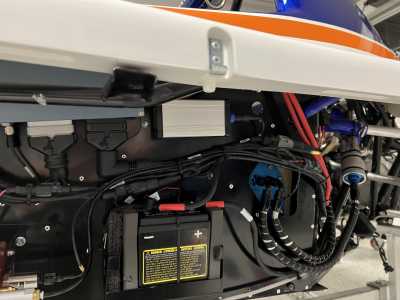
The next step is to remove the 3 bolts on the bottom of the side pod (See green arrows in Figure 2). Then remove the fastener from the black rod near the back of the side pod that attaches the side pod to the aft chassis (Blue arrow in Figure 2). If you remove the radiator from the side pod there is a bolt on the top of the side pod (yellow arrow in Figure 2) that needs to be removed and there is a similar bolt on the bottom. You will also have to remove the tie wrap that holds the water pump to the side pod.
Figure 2
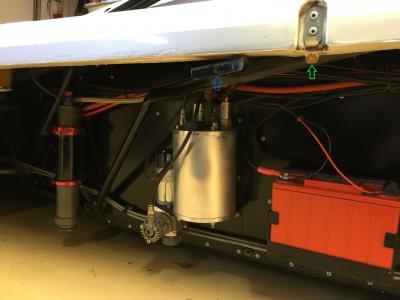
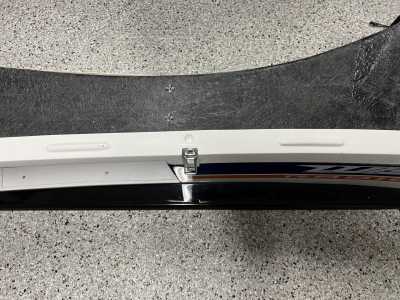
Before you remove the clips that hold the side pod in place be aware that there is a fiberglass pin in the top body section that fits into a hole in the side pod on the top surface (See the green arrow in Figure 3). You need to lift the upper body up enough to allow this pin to clear the side pod before the side pod is removed or the pin will break. The orange arrow in Figure 2 shows where the bolt attaches the back of the upper body to the side pod.
Figure 3
The next step is un-latch the clips that hold the upper body to the side pod. There is one on the side and one on the front of the side pod. Once these clips have been loosened the side pod is resting on the black bracket near the center of the side pod (See blue arrow in Figure 3). Then lift the upper body enough to clear the center pin and rear attachment point and slide the side pod outward and then it can be lowered to the ground.
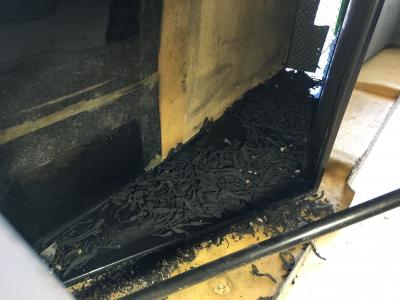
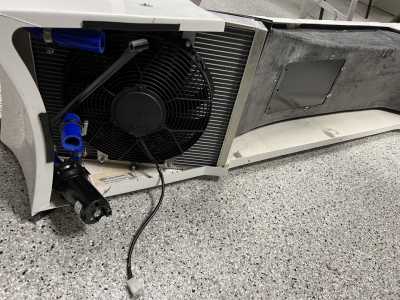
Once you have the side pod removed you will likely be surprised by how much tire rubber has managed to sneak past the inlet screens and is sitting in front of the radiator (See Figure 4). 😉
Figure 4
Excellent.
I'll add a few differences for the 1st gen SR3's.
1. The radiator is not bolted in top/bottom. It comes out by sliding it out once the side pod is removed. You need to disconnect the top and bottom hose and also remove the fan that's attached to the radiator.
2. There is no nylon pin to look out for when removing the side pod.
3. Be sure to remove the two bolts that go through the side of the pod. You can see where they're locate in this picture on the support bar. They're the bolts with washers behind them. If you don't remove them you'll pull them right through the fiberglass.
I was a little worried that this would be a big job, but it went quite well on my SR3 XX. I left the radiator connected to the side pod, and disconnected two water lines and two electrical connectors. It really helps to get the car up a couple of feet on chassis stands so you can see to thread the three lower bolts. If you have to do this blind, it can be quite difficult to maneuver the side pod up or down to thread these bolts into the chassis.
I did not need to loosen the center section or roll bar supports. Some pictures:
@charleyhradicalsportscarregistry-com thank you for the excellent write up with photos! And thank you @DavidF for the additional information regarding the center section and roll bars. The information both of you provided enabled this first timer to easily do the job.
I lifted mine with the air jacks, then used a floor jack to raise the front and rear higher (separately) and placed the wheels on top of 2x4 stands. This gives plenty of clearance for maintenance, and in my case removal of the engine.
My question for y'all: is there a way to remove the right side pod which contains the engine and GDU oil radiators without disconnecting the fluid circuits and removing the radiators with the pod? I need to replace the engine oil radiator due to mechanical engine failure and would prefer not to touch the GDU circuit. I'll do what is necessary, so thanks in advance for any tips/tricks.
To follow up from my last post, I went ahead and drained some fluid from the GDU cooling circuit, removed the cooler lines and blocked them off in order to remove the right side pod. With the pod off I found rivets were the only fasteners holding the bracket in place. When I go to reassemble I'll top off the GDU oil per other posts and go on my merry way.

