Prosport Project car
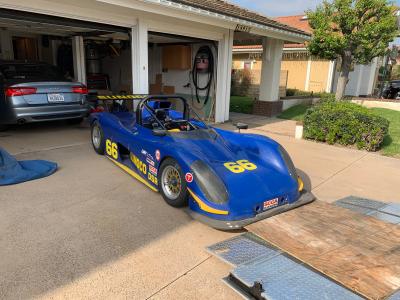
Last December I picked up a 2000 Prosport as a project car. I figured this was a great way to learn about the earlier Radical Cars. This car was owned by a good friend of mine for the last 7 years and it has been sitting in his car collection ever since. The day the car was delivered he started it up and drove it around his parking lot for about a minute and then it has remained in his large collection ever since. I have a copy of the "For sale" ad from when my friend purchased the car and the previous owner said the car had 20 hours on the chassis and 12 hours on the motor. Looking at the car I have no reason to doubt his claims.
The car is chassis number RMS 0108 and it has a Loynings built Kawasaki 1000cc engine with paddle shifting. The car is in excellent shape, but there are some basic things that I needed to to to it to get it running again. Obviously the battery is dead so I purchased a new Odyssey PC 545 MJ (The MJ version has a metal jacket to allow the battery to work in harsher environments). The next step was to order a new fuel cell for the car so I contacted Harmon Racing cells and they made me a beautiful new cell. It is amazing what an 18 year old fuel cell looks like. 😉 The other thing I wanted to do is get a new front splitter for the car. The car currently had a splitter that is made from plywood which looks like it would work just fine, but I prefer the standard splitter.
Here are some pictures of 108 when it arrived.
Looks nice Charley. Quite a find for an old track car. Any idea when you might drive it in anger?
I hope to have it track ready in a month or so. I will take it out to make sure everything is working properly, but I don't plan to keep it. I am looking forward to getting it out on track so I can experience one first hand.
Charley
I finally had some time to work on the car and made good progress getting the fuel cell installed. The biggest challenge was getting the wires to the fuel cell hooked up. There is no good way to connect them without removing the side pod. My wife has thin arms and was able to get the connector attached, but doesn’t have the strength to lock it in place because of the awkward position. So tomorrow I will take off the side pod so I can ensure it is tightly installed.
Charley
Here is a brief update. The fuel cell is installed. The front splitter is installed. Then when I went to bleed the brakes I learned that silicone based brake fluid does not like to sit in a car for many years. I posted about this in another post but I figured I would add it here for completeness. The short version of the story is that I thoroughly flushed out the brake lines and rebuilt all of the calipers and master cylinders.
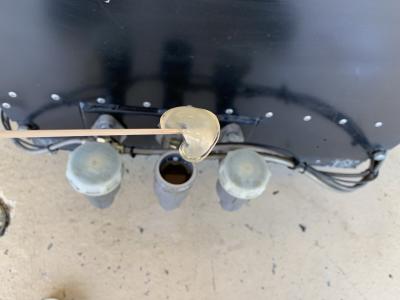
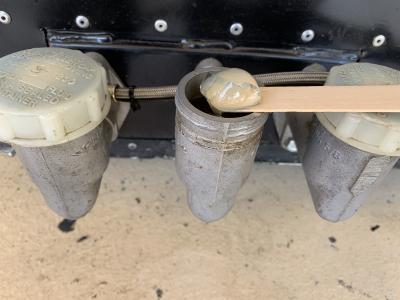
This is what 7+ year old SRF looks like when not used.
Here are some shots of one of the front calipers apart. The seals looked good, but rebuilding them was the only way to be sure that they were track worthy.
Here is a shot of the master cylinder piston.
Nicely done! Charley, any idea why silicone-based brake fluid was in the car? I hate the stuff, and think it should never be within a mile of a race car...
Charley, I see that your paddle shift kit has the solenoid attached to the shift lever by the driver instead of being attached to the shift linkage on the transmission. I purchased a Flat Shifter kit so am thinking of how best to install it.
Do you see any downsides to installing the actuator where your's is installed?
Posted by: John ParsonsNicely done! Charley, any idea why silicone-based brake fluid was in the car? I hate the stuff, and think it should never be within a mile of a race car...
Thanks John. I spoke with the last owner that actually operated the car (2 owners ago) and he said that he only used Castrol SRF in his cars so I am assuming that is the fluid that is in the car. That has one of the highest boiling points of any brake fluid, and it is crazy expensive... But apparently it is important to change it as the manufacture specifies (every 18 months).
Posted by: johnsopaCharley, I see that your paddle shift kit has the solenoid attached to the shift lever by the driver instead of being attached to the shift linkage on the transmission. I purchased a Flat Shifter kit so am thinking of how best to install it.
Do you see any downsides to installing the actuator where your's is installed?
John, I haven't driven the car yet, but I spoke with the previous owner that installed it and asked him why he installed it this way. He told me that the shop that did the installation for him chose to do it this way so he could also use the shifter if wanted or necessary. He said that if he were going to do it again he would install it at the engine. That way there is less linkage to cause problems.


