driveshaft repacking?
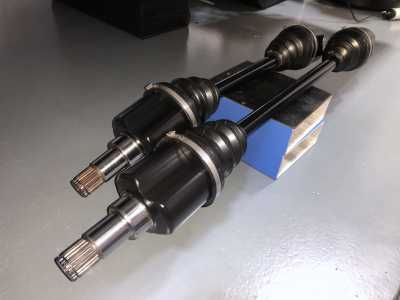
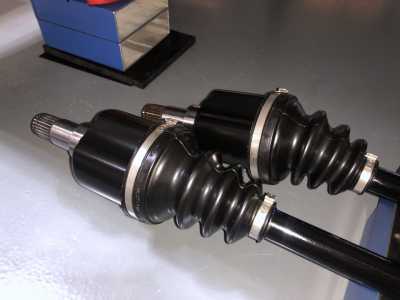
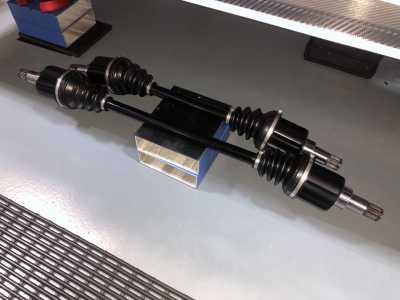
Several questions about this, cant seem to find tutorial for SR3 XX. I have seen race shops use normal band clamps on seal boots (180 apart) after repacking. But, what is easiest procedure for removal of the shafts and access to work on a bench?
That is what I thought. Someone told me is was very easy access without disassembly of whole upright, but was unclear if tackle from top or bottom. Axle joint packing is forthcoming after next weekend. Thanks
hiya,
i'm about to do this myself as well, do you have any pics or tips on the 2nd part, or is it just as per the manual, clean, apply new grease? I've never removed a driveshaft ever, no idea what to expect.
what did you use to clean it? Are there any other consumables i need to get or is it just new grease?
EDIT: i just did the usual 10 min research. Seems fairly straightforward, looks like i'll need those steel clamps and that tool to tighten them, and use the recommended amount of grease from the manual.
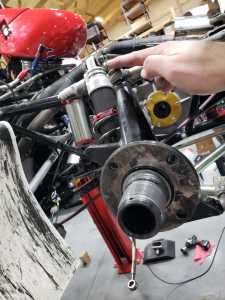
Yes, very straightforward and easy after the first one. Simply remove teh top bolt from suspension arm to wheel upright (safety wired). Then, the upright will swing out allowing enough room to manuever the axle out of the space and GDU. Remove the large diameter clamps (not small) and separate the two ends. I simply wipe out all the grease using paper towels from the tripod and spline housing and inspect the rollers. If all looks well, apply designated amount of grease into the housing, insert tripod, and attach new clamp. It goes quickly. IMO, after repacking numerous times thus far, they are capable of going longer than suggested ~10 run time hours as I have yet to see any signs of wear or grease breakdown.
yeh thanks i removed them today, was very easy.
What Grease did you use?
a few things tripped me up momentarily..... like realising you have to pull out the wheel-side end out first.
The splines on the wheel end had a reddish hue to it, i guess surface rust. I'll apply some sort of grease on them before reinserting. GDU end was fine.
And i also struggled and panicked when i couldn't re-align the upright to the top wishbone mount. All i had to do was raise the lower wishbone a tiny amount with my jack and it was fine.
now i have 2 shafts sat inside waiting to be regreased.
Another piece of radical maintenance learnt today!
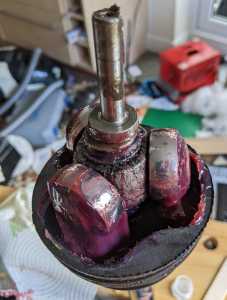
It's a dirty job, that's for sure. It's the grease between the needle bearings that need to be periodically changed. Most of the grease on the outside of the bearings just goes along for the ride and never gets dirty. If you do complete the job, do your best to get all the old grease out. That looks like CV-2 grease, and if you're swapping over to the GKN, you'll not want cross-contamination.
G'day All,
I've just completed my first SR3 driveshaft rebuild according to the schedule... done at around 12 hours on my HD driveshafts (on-track time) rather than the 10 hours Radical recommend. Like others, I have to say that it looks like these will go a lot longer than 10 or even 15 hours between services... I'd be happy to go straight to 15 hours next time based on what I'm seeing.... and wouldn't be surprised if I end up at 20 hours after that. Not really surprising when you consider that our daily driven road cars don't need any of this level of maintenance...
I used information in this thread, as well as the thread in the link below to guide me on how to do it, including the posts from @davidf who had a special tool for forcing grease into the tripod joints... very nice idea.
This is the best thing about this Forum compared to the Facebook pages... much better place to share detailed info like this - thanks to everyone who takes the time to share!
I have to say this service/rebuild was fairly easy to do... but it was a real shit of a job. Working with the grease reminds me of working with polyurethane or silicone sealants.... once you start it tends to get everywhere!!
I found the best way of doing it was to leave the driveshaft boot on the driveshaft (leaving the small end clamped on the shaft), and simply take the joint apart by removing the larger Oetiker clamp. This lets you slide the metal cup/spline assembly off the tripod joints.
Then the messy bit.... wiping all the excess old grease off the tripod joints and out of the boot/shaft. To be honest I found the best way of getting the majority of grease out of the boot was to use a wooden stick (large ice-cream stick) and simply scraping it out and straight into the rubbish bin. Once the bulk of the grease was out then I wiped the boots, shaft and joints clean with rags... and again put these straight into the bin.... less mess and cleaning up.
I decided at this point to take the tripod joints off the driveshafts to check the splines, by removing the circlips. This was relatively simple, but I had to knock the shaft out with a soft faced hammer and then a brass drift. The splines look perfect although there was some gummy build up in there which was why they were tight. I wouldn't bother doing this the next time....
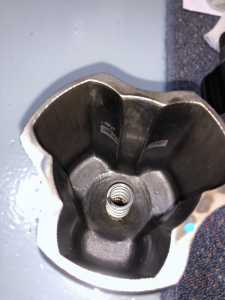
The other half of the joint (the metal cup and spline) is also easily cleaned out using the stick, then rags too... just messy. Be careful when doing this to remove the spring loaded plunger than sits in the bottom of the cup. This needs to get cleaned as well, and I noticed while doing this that there is a hole that runs right through the middle of the plunger that had a lot of old gunky grease inside... well worth cleaning out with brake cleaner/solvent before reinstalling.
Once everything was clean, I wiped everything with rags soaked in brake cleaner/solvent to remove all the grease residue and had a really good look at the cups to check for wear. You could see where the tripods had been running as there was a shiny section in each of the tripod channels... but other than that they looked brand new. I couldn't feel any wear with my finger of fingernail on that shiny section... so was happy they were good to go again.
Re-greasing the tripod roller bearings - @davidf has a pretty neat tool that forces new grease through the tripod joint roller bearings (refer his previous posts in that link I attached above)... it looked so good I wondered if I could copy something similar.
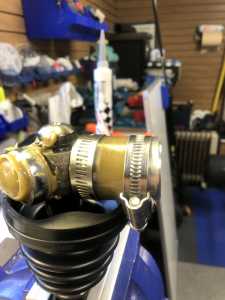
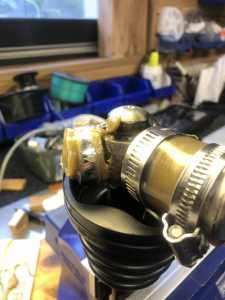
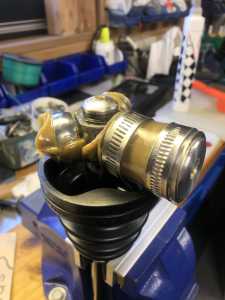
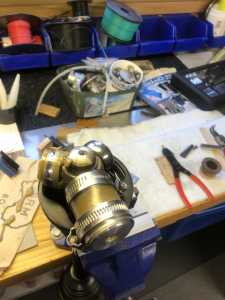
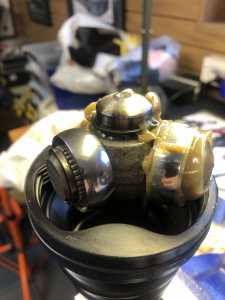
In the end this was easy and the solution worked fantastically. I simply found a piece of 34mm inside diameter clear plastic hose (that matches the approximate outside diameter of the tripod roller bearing). I then machined up an aluminium plug of the same diameter, about 20mm long and drilled a 6mm hole through the middle. I then put this aluminium plug inside a short piece of the hose and used a hose clamp to hold it in place... pushed the open end of the hose onto each tripod joint bearing and used another hose clamp to hold it in position , and then simply forced new grease in through the 6mm hole.... this squeezed the old grease out of the roller bearing from the outside to the inside where it could be cleaned away with a rag until I saw fresh grease appearing out of each joint.... done! - see pictures below
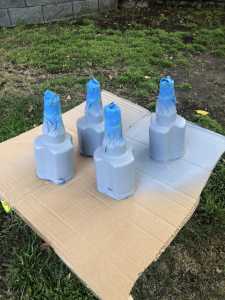
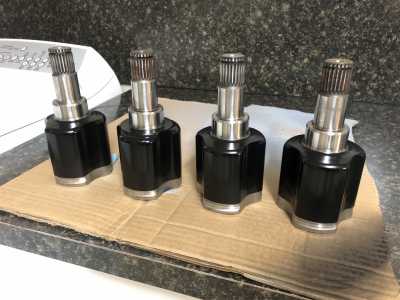
Before re-assembling everything, my OCD determined a coat of paint was required... glad I did... made a big difference (to me at least!)
I then put grease inside the hole that the spring loaded plunger sits in at the back of the cup half, and re-installed the plungers. As others have said, the grease helped keep it located.
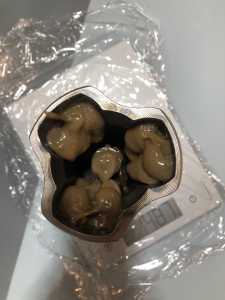
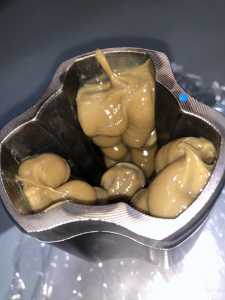
Then I weighed 70 grams of new GKN tripod grease into each cup/spline half. The easiest way to do this was to stick the joint on a digital scale and squirt grease in to each 'valley' and a little onto the end of the spring loaded plunger - didn't take long at all and was clean. For reference, here's what 70-75 grams of grease looked like in each cup.
To finish off the job it was just a matter of putting the shaft/boot and the cup/spline assemblies back together and installing a new Oetiker clamp.
Job done... but not one I would want to do too often! I'll be finding remnants of grease in my garage for a month!
Cheers!
What a great write up, thank you sir.
@rjbender Nice write up! I'll be doing the job (for the umpteenth time) again next month as I get my SR8 ready for the upcoming spring "season". I was gonna do something similar to your bearing packer tool -- thanks very much for the photos and description. The only annoying thing with my car is that there are two different size tripods (inners are smaller than outers), so I'll need to make 2 tools.
John
@parsonsj ... G'day John. If there's not much diameter difference between them, then maybe you could just build the tool for the larger diameter joint, and then 'sleeve' the roller bearing end using another piece of plastic hose inside the main hose? (ie using the second piece of hose as a sleeve to reduce the diameter to what you need... the hose clip will look after sealing it up)... if you get flexible enough material (even silicon radiator hose?) you might get away with that?
Awesome write up! And love the homemade tool idea. I've found that about 70g of grease works a lot better than the recommended 100g in the SR10 manual.

