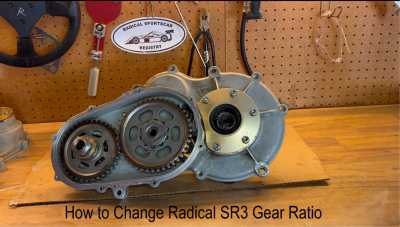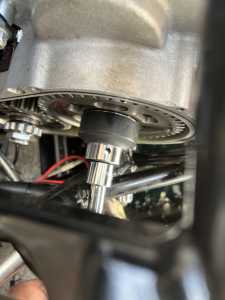
Video on how to change Gear Ratio sets in the SR3 Gear Drive Unit (GDU)
Here is a short video on how to change the Gear Ratio sets in the SR3 Gear Drive Unit (GDU).
https://radicalsportscarregistry.com/sr3-gdu-ratio-gear-change/
Great Video Charley! - I'm about to do my first ratio change (while the GDU is in the car) and I'm purchasing the 33mm, 42mm and Loctite 648 Compound.
Just wondering if I need anything special in terms of the depth of the sockets? Looks like there will be plenty of room on the nut holding the front/smaller gear in the set, but also looks like there won't be a lot of room between the nut and the cars chassis on the larger/rear gear... any advice before I get something that won't fit?
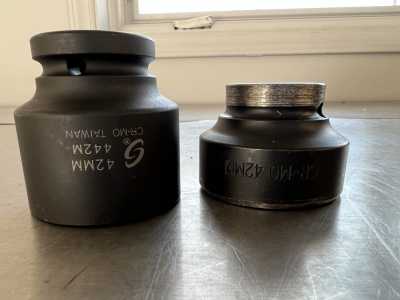
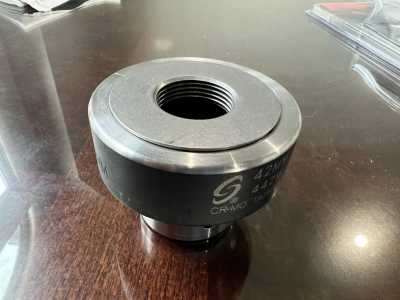
The manual says 33mm, but it is actually a 32mm. Also, it is a tight fit for a 42mm impact socket, so these need to be milled and lathed down to clear the frame. The shop rag method that Charley shows works, and an impact driver to loosen. Clean the male and female threads with brake cleaner and dry, then small amount of red (271) Loctite when installing the new ratios.
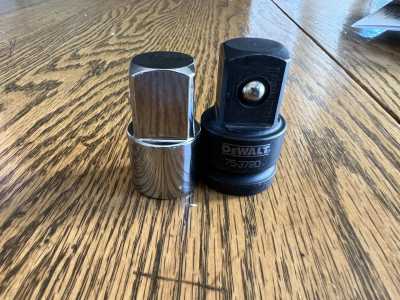
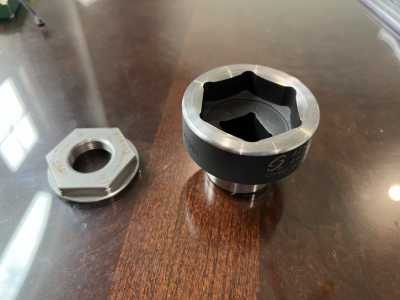
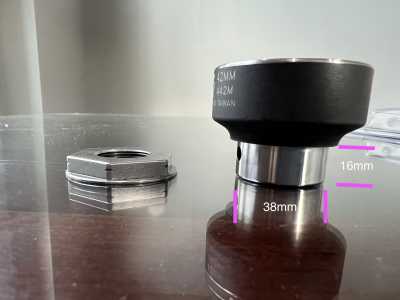
The 1/2 to 3/4 adapter also needs to be narrow; I use the one on the left below because the impact adapter will not clear the frame.
Also, be careful with the torque on the side cover M6 screws. The manual says something like 14 to 16 Nm which is too high and you can pull the threads out of the aluminum case -- especially the two hex head bolts on that cover. I would only hand tighten snug, and leave your torque wrench in your toolbox.
@davidf - Thanks David,
Sheesh!! - glad I asked that question before I got into the job! - I appreciate your reply as it will save me time and frustration when I finally get into it!!
So based on your comments re the sizes, I wonder if they are actually 1-1/4" (31.75mm) and 1-11/16" (42.86mm)??
I gather you are using a 1/2" drive impact driver? Mine is a Milwaukee 3/4" drive, so hopefully I will not need an adaptor, but will probably need an extension (I have 2", 4" and 6" options) to keep the driver well clear of the chassis (towards to outside of the car)
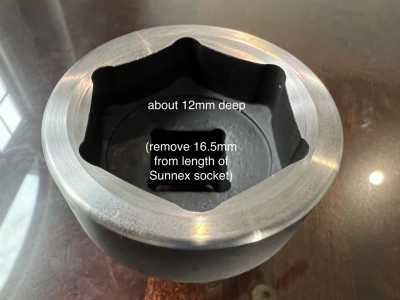
The photo of the machined socket really helps! Any chance you could tell me what;
- the overall length is?
- the inside depth is after you have machine it (ie, the maximum height of a 42mm nut that would go inside)?
- the diameter is that you have machined it down to on the socket driver end?
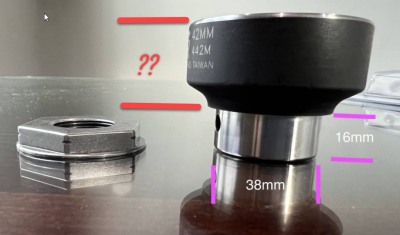
Hi Rod. Unfortunately I cannot give you exact measurements at the moment. In the photo of the two 42mm sockets above, mine is on the left and the machined-down one belongs to WISKO on the right. I just had mine machined down last week and I brought it home from VIR, but now I cannot find it. I either misplaced it or it might have rolled out of my truck cab. It is agonizing that I cannot find it. If/when I find it I will report back.
Anyway, the collar needs to be lathed down such that it is flush with the narrowest groove or just a little more because this area will hit the frame if you don't take enough off. The length should be about 1/4 inch or 6mm deeper (you can probably go a little longer) than the 42mm locknut height. The socket shown is a Sunex 442M 3/4 drive standard 6 point metric impact socket.
On a different but related topic, I use a 3/8 inch size 19mm non-impact socket (made by Gearwrench) to remove the reverse sensor and and index plunger/detent when disassembling the GDU. This just fits and does not need to be machined down.
@davidf - regarding your comment "On a different but related topic, I use a 3/8 inch size 19mm non-impact socket (made by Gearwrench) to remove the reverse sensor and and index plunger/detent when disassembling the GDU. This just fits and does not need to be machined down."
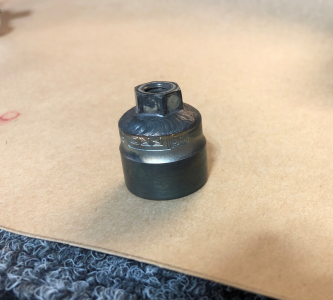
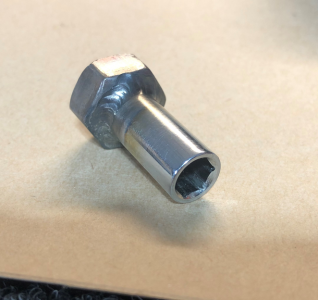
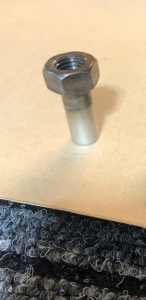
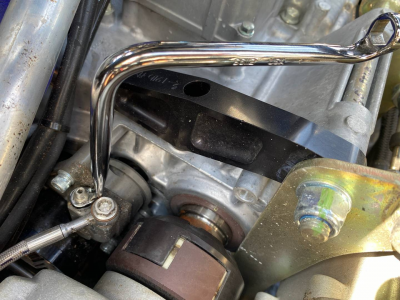
I had to remove the reverse indent assembly... but while the GDU was in the car. I made the tool below, by machining down (diameter and length) a 19mm socket, then welded an M6 nut on top that allowed me to get a ratchet ring spanner onto it (couldn't even get a 1/4" socket drive down from above)
The other really handy tool I have made is for bleeding the clutch slave cylinder. I had real trouble getting a wrench onto the bleed nipple and being able to turn it enough without having to take it on/off... so I made this socket adaptor. Its a 1/4" drive 'deep' socket (not sure of the hex size, but whatever the bleed nipple is), and then welded a nut onto the top of that. The deep socket acts as a 'riser' and allows me to get a ring spanner onto the larger nut in an area where I can turn it without much interference. To use it, the plastic bleed tube is fed down through the socket first, then the tube is pushed over the nipple as normal, then the socket is slid down the plastic tube and onto the hex head of the bleed nipple. Works great.... maybe others have a different solution?
Posted by: @rjbenderThe photo of the machined socket really helps! Any chance you could tell me what;
- the overall length is?
- the inside depth is after you have machine it (ie, the maximum height of a 42mm nut that would go inside)?
- the diameter is that you have machined it down to on the socket driver end?
The nut thickness is 8mm, 6.6mm not including the flange thickness.
I have a few extra of these if someone needs one. $75 plus shipping.
@davidf - great info - thankyou. There's just one more dimension I would need - could you help again?
such a fantastic vid, thank you so much for this. Whilst i'm faffing about with my botched bung thread on my oil tank and the GDU fluid already drained, i was thinking of removing the GDU anyway because i'm running the standard 3.07 which is geared too long for the main circuits i play on..
just need to buy these giant sockets...
the one aspect i'm not sure on is at 3:23 when you say that the nuts are 'staked on'.
Using a punch to hammer in the edge of the nut into those recesses sounds a bit tricky and precise job..... is it as difficult as it sounds or am i overcomplicating it? So you literally just take a small punch, line it up, and bend a bit of the edge in?
when you're removing the nut with the impact, wouldn't you have to prize these edges back out again before removing the nut, or are you saying the impact has enough force to simply bend these out as you turn the nut out?

