Video on how to change Gear Ratio sets in the SR3 Gear Drive Unit (GDU)
@rojid, thank you for your complement on the video, I am glad it is helpful.
You don’t need to remove the GDU to change the gears. Staking the nuts is very simple. You simply use a punch and a hammer to bend some tabs a bit. Removing is straight forward also. Using a little leverage overcomes the stakes>
Also, i read your Facebook post about your drysump tank. I have one that I can sell you for a very reasonable price, but the cost of shipping might be a lot.
@charleyhradicalsportscarregistry-com
thanks sounds good, just ordered some smaller ratios from radical.
aah no worries, yes i'm sure shipping would be a lot! I have several options, i've ordered some longer bolts which are about twice as long as the original bung and hopefully after wrapping some PTFE tape around it, it'll catch the remaining good thread inside and mate.
If it doesn't then i'll have to remove the tank out the car to either tap in a new thread or preferably just get someone to weld over it and seal it up. I've got 8 days to fix it 😩
Here's some useful information I got from radical:
"There is few ways of sealing GDU cover and it all depends on circumstances and personal preference. If both surfaces are in a good shape a new O-ring and standard grease should provide enough protection. Alternatively, any type of RTV silicone in combination with the O-ring can be used. The only downside is problematic removal of the cover once RTV is set. I personally like to use a product called Hylomar Universal Blue. It is a non-setting sealant which is allowing you to remove the casing cover with an ease but provides grate sealing properties."
Luckily Hylomar universal blue is an easy product to find in the UK.
Do i dare attempt to do this for the first time and switch out the ratios before the track day next week? ..........what could possibly go wrong 🤣 🤯
well i've just swapped out the ratios for the first time.
Where are you meant to put the loctite? Is it just on the thread?
Or are you also meant to put it in between the spacer, gear, nut? 648 retaining compound appears to be for bearings as opposed to thread locker so i'm wondering where to apply it to here.
And it's expensive stuff here in the UK at £50 for 50ml, which is the smallest amount you can buy for the genuine stuff...so i want to make sure i'm using it properly.
I just use the red 271 loctite on the threads of the lock nuts. No problems with loosening, and no problem removing the lock nuts with a 1/2 inch impact wrench.
i'm now experiencing the problem of tightening these back up.
did you also torque back to spec using a torque wrench + wobble extension?
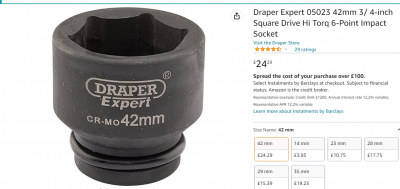
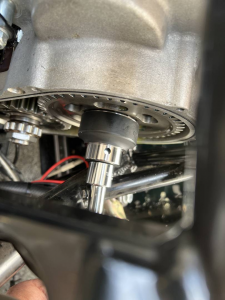
the problem i have is even if i milled the 42mm down, i can't put enough perpendicular force whilst also torquing, so as i'm pulling the socket it's just coming off the nut.
now i'm a bit puzzled as to how i can actually do this..there isn't enough room to get a torque wrench in there without using a wobble extension, or, i get a much shorter 1/2" to 3/4" adapter but even then i don't think it'd fit. I don't know.
what tool combo's did you guys actually use to torque it back to ~110nm?
radical sell what appear to be completley off-the-shelf parts, same as what i've already bought.
the only other thing i can think off is to simply use my gun, have it on the lowest setting which is 0-475nm, and impact for a few seconds.. but i'd rather not.
EDIT:
so....for the 32mm i can' just get that in a 1/2" drive, and i've found a shallow socket for £8. That should do nicely.
As for the 42mm, if i can machine down the head as you've done, it only needs to have about 10mm of internal depth, and i can get one of these low profile adaptors - that should give me enough room for my torque wrench.
hopefully that's problem solved..
can a regular lathe with a decent cutting tool machine down this CHROME MOLYBDENUM STEEL socket?
Yes, I always use a 1/2 inch torque wrench set to 80 foot pounds to tighten the lock nuts ... with a 1/2 inch wobble extension and 1/2 to 3/4 adapter.
If you look at all of the posts on the first page of this topic, you will find the solution which is to machine down your 42mm socket so that it clears the chassis. If you have the correct machined sockets, extension, and adapter, it is a snap to tighten the ratio lock nuts.
The workaround which is a lot of extra work is to remove your GDU from your chassis. If you do this, make certain you have at least five extra drive pegs because at least 5 of the 8 will be broken. I have done this several times to rebuild a GDU and it is 20 times the effort to remove and install the GDU. My recommendation is to find a machinist who will modify your 42mm socket, and find the other pieces that I have listed.
Posted by: @rojidcan a regular lathe with a decent cutting tool machine down this CHROME MOLYBDENUM STEEL socket?
Yes. Use cutting fluid and take a little off at a time to keep your cutting bit cool.
@davidf well I got my angle grinder out and did the job. Cut off about half of the socket head, and that low profile drive adapter did the trick.
The stumbling block I have now is stopping the gears from turning so I can actually torque the nuts.
How on earth are you guys locking them in place? I've tried hardwood, wedged a piece in, it's still managing to chew up the wood before I hit the correct torque.
I'm out of ideas. What do you guys use? There's no way some piece of cloth is enough, or am I going to have to find the finest hardwoods in the land and shape it into a perfect wedge?!
So frustrating.
I'm almost at the point of just putting my impact on it for about a second and settle for that, but I don't want to give in just yet.
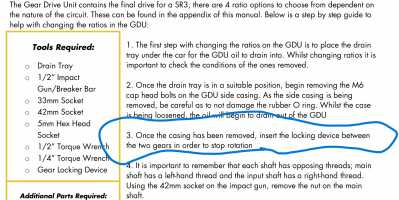
the manual mentions a 'Gear locking device'. I'll call radical on Monday and ask what this mystery part is and if they sell one.
If you don't already hate me, you will now. To be fair, I asked a pro technician with 40 years of experience the exact same question. I was scratching my head, and I texted Jonathan from Group-A racing, and he referred me to Lenny his chief tech.
The owner's manual tells you to place the locking device between the teeth. You MUST obtain one of these locking devices.
A piece of wood is not the locking device... the locking device is a shop rag. A towel. It works, and you can use a torque wrench (please not an impact wrench) to torque to 80 foot pounds.
Oh, and it you don't believe it, the video that Charlie uploaded actually shows and confirms the specific locking device you must have to do this.
😀
@davidf haha right i'll give it another go then. dammit, that's what everyone has been saying, just use a rag.
I've tried a tea towel and a microfibre cloth and both times i ended up just tearing through them.
clearly i'm not stuffing it in properly....i'll go to the shop and buy a strong towel or something similar and give it a proper go.
I have used a dowel in the past but found this inexpensive tool that works well. It has a magnet so it doesn't fall out.
https://www.motionpro.com/product/08-0427
that little device worked perfectly, all for £15.
However.......it turned out the whole problem was because my reversible torque wrench did not click in the other direction. Really....really stupid.
Picked up a Norbar 300 and it could not have been easier to torque those nuts to spec.
And that's when i encountered a new problem - its 2 steps forward and 1 back.
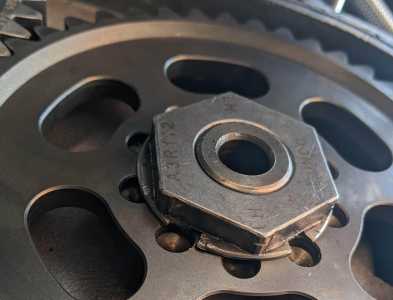
Attempting to punch a notch in the edge of the nuts, they simply crumbled.
I don't know if that's just due to the nuts becoming 'brittle' due to heat cycles or whether its due to the over-tightening/200nm force i was putting through them prior to discovering the torque wrench issue.
I was using a proper punch set and hammer and only tapping gently but it barely started to make a dent before breaking off.
I'll have to order a set of new nuts from radical now and try again. So frustrating!
Good that you caught that so the metal pieces do not stay inside. It has happened to me. I don't know if there is a reason this happens other than metal fatigue, but I stopped staking them. Now I just clean the shaft threads and lock nuts really well with Brakleen, and then I use red loctite.
I don't know whether this is good or bad advice. Do what you think is best, however I have not had a problem with red loctite and I got tired of replacing the lock nuts. Radical techs have told me to use the lock nuts up to three times and then replace. If you race, you are often changing the ratio gears. If I do not have time to clean the threads well and dry them, which would usually only occur between sessions when I realize I want to change the ratio at the track, then I do try to stake the lock nuts in addition to red loctite.
Like a lot of other parts, it is good to have a spare set or two of lock nuts on hand.

